When creating mobile apps it is very common for a developer to encounter the need to manage different environments. The most common scenario for this is when we are working on an app that relies on a backend to work, and we need to be able to access different instances of the API when developing, testing or going live.
Since I started developing iOS apps I saw many approaches to resolve this problem.
Some people just comment/uncomment server urls as needed (very nasty practice IMO).
Others use preprocessor flags, but I think that approach can easily lead to mistakes. Someone can forget to set the flags accordingly, and also for someone new to the project it might not be that intuitive to realize how the environment configuration is being done.
After searching for a better way to solve this problem, we found some useful tips, but no the exact approach we were looking for, so we came up with this solution, which we believe to be more elegant, clear and less error-leading than other solutions.
Intro
For this tutorial we are going to assume we have three environment configurations:
- Development (or Debug)
- Staging (or Testing)
- Release (or Production)
Since we already have the Debug and Release build configurations (they are created by default when we create an Xcode project), we will use them for Development and Release respectively. We have to create a new build configuration for Testing
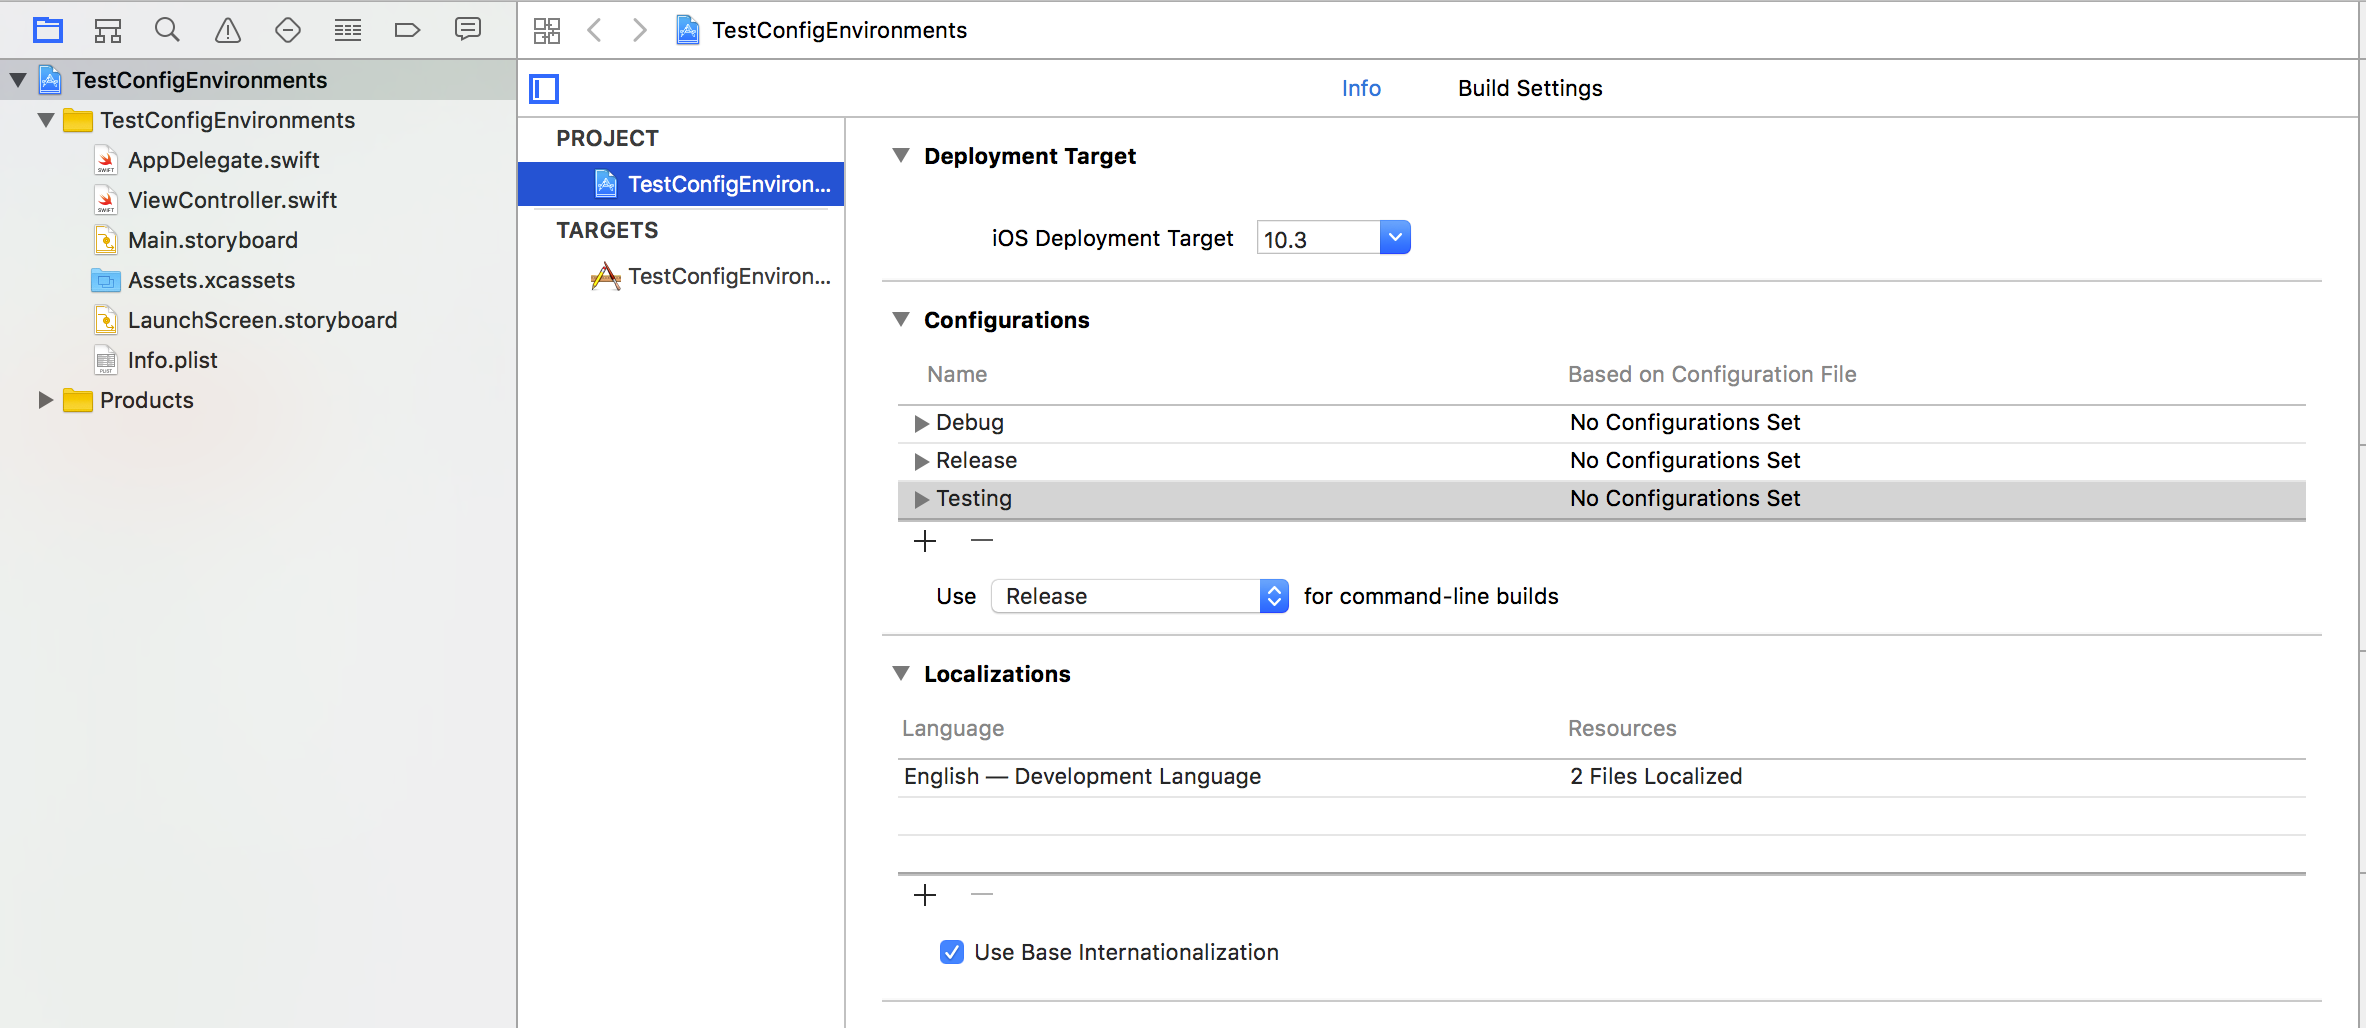
Here we can see where we need to add the new Configuration.
Since we are going to use it for internal builds pointing to the Staging environment and not for running from Xcode, we are going to create it by duplicating the Release build configuration.
Xcode schemes
We want to have three Xcode schemes. Each one using their respective build configuration.
First, we are going to delete the default scheme that came with our new Xcode project.
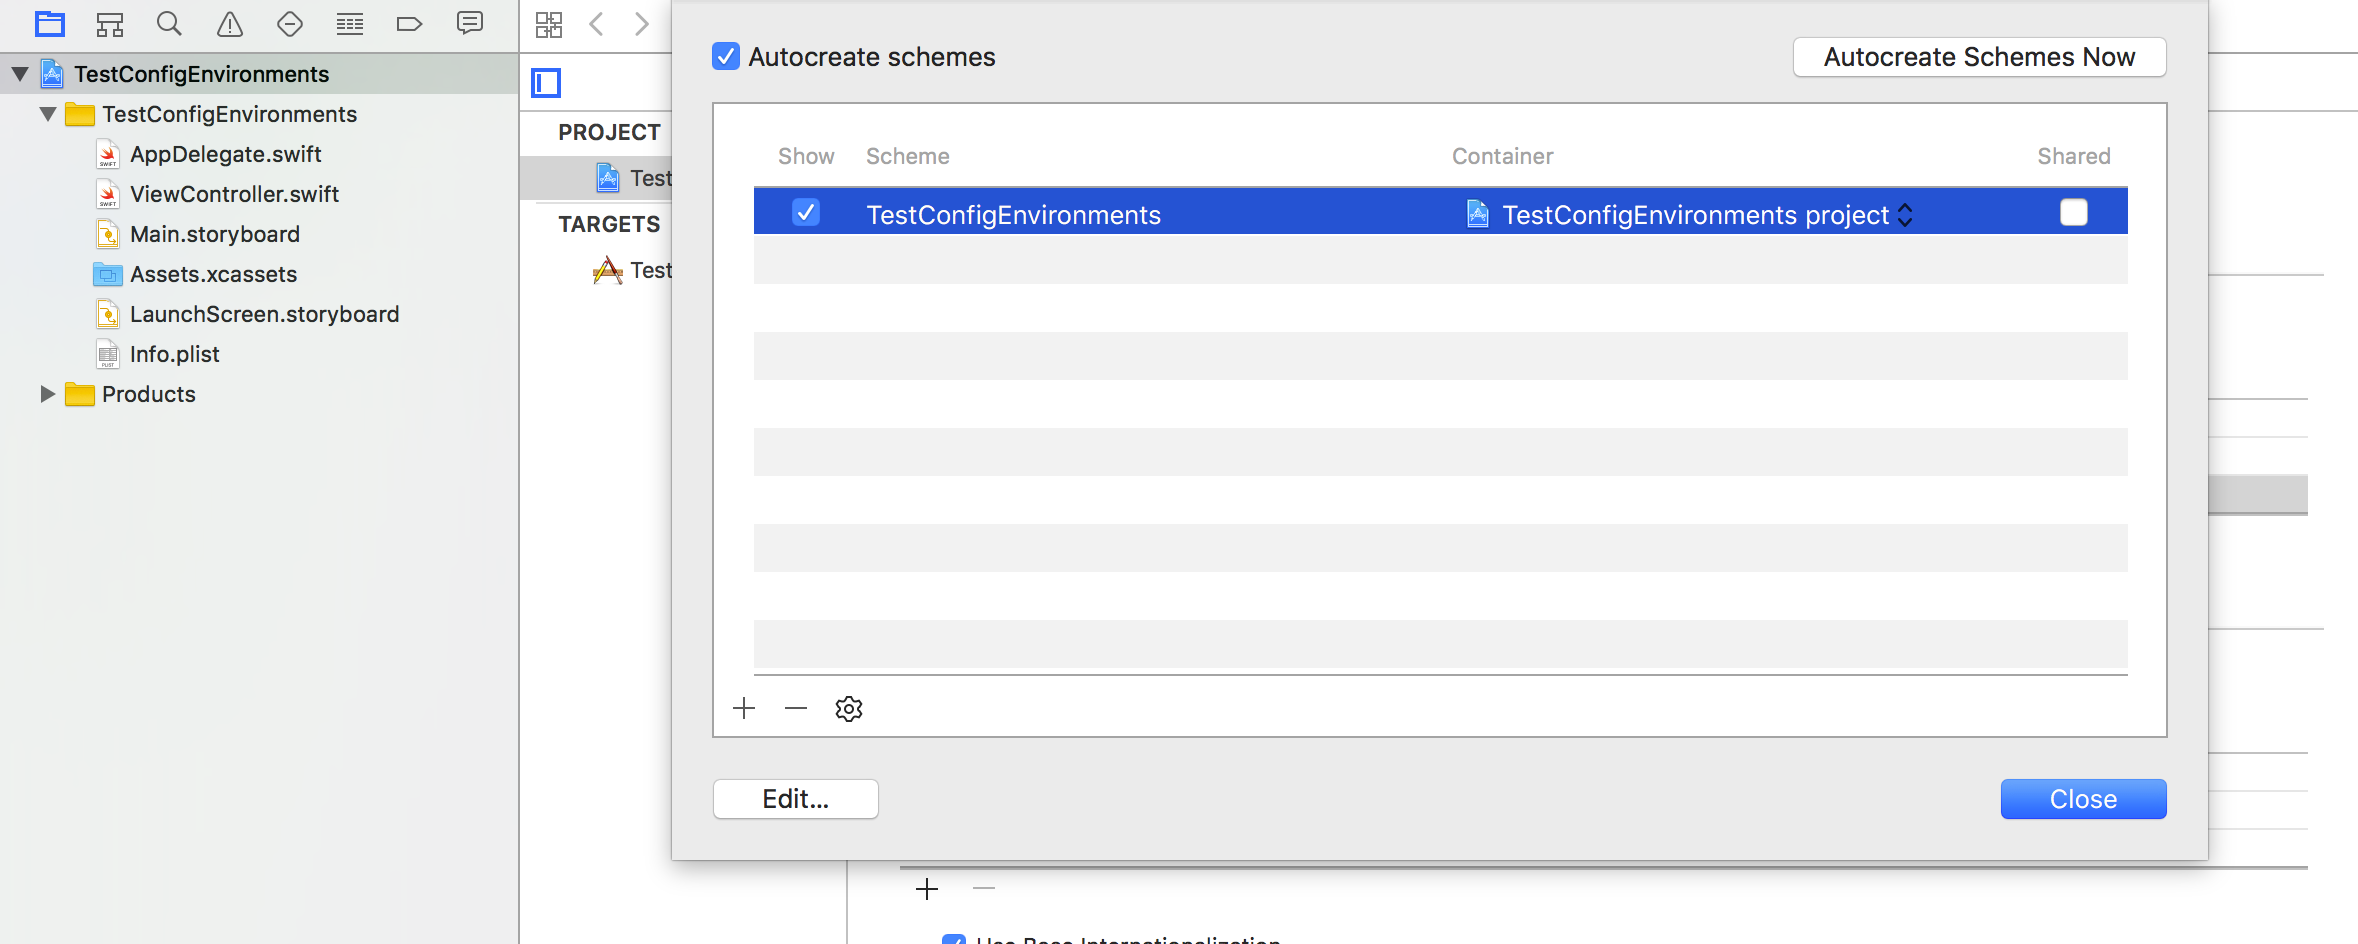
After deleting the default scheme we will create three schemes with the same names as the Build Configurations we already have.
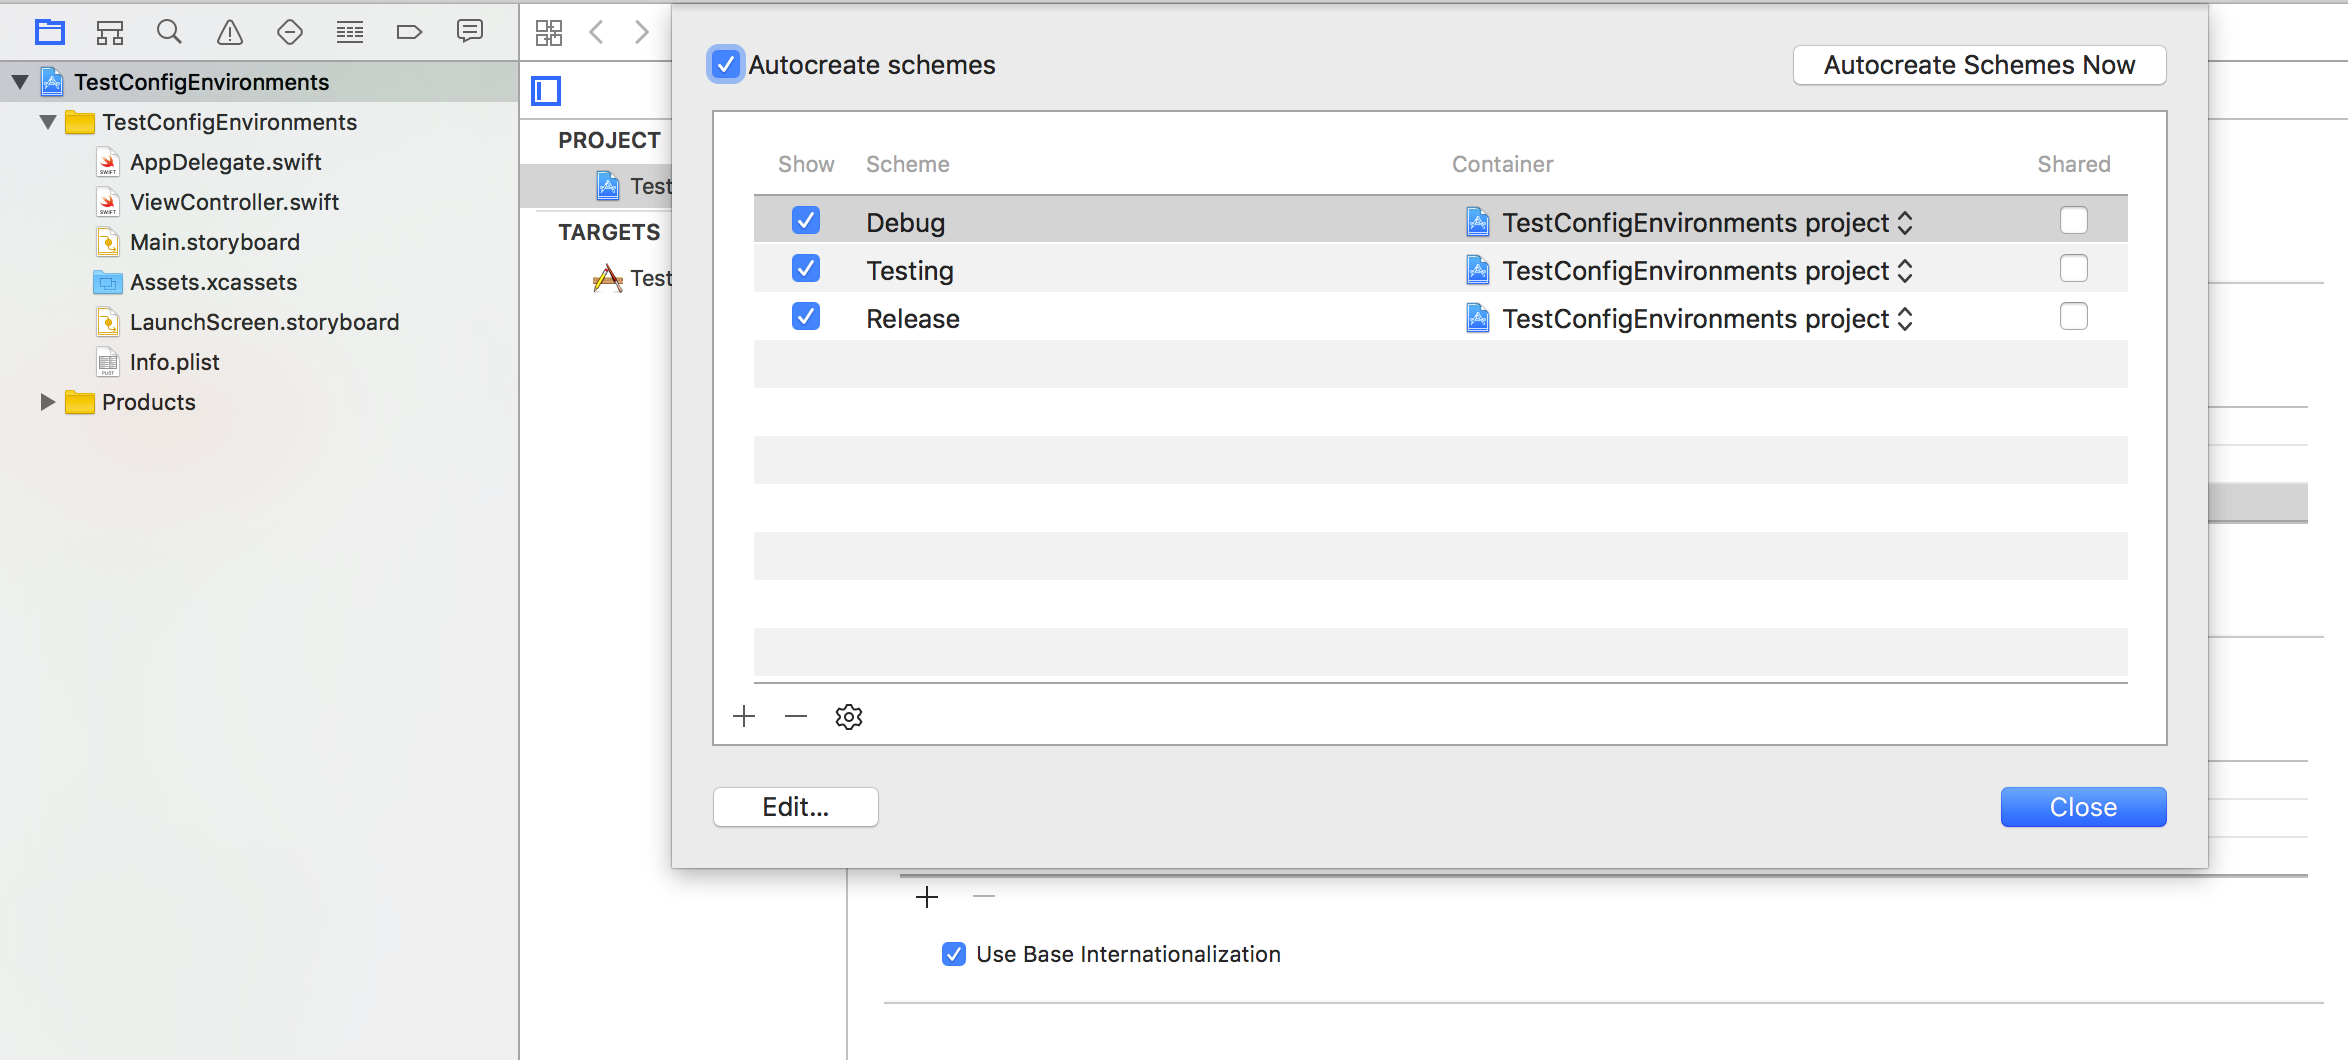
Now we will configure each scheme accordingly:
Debug
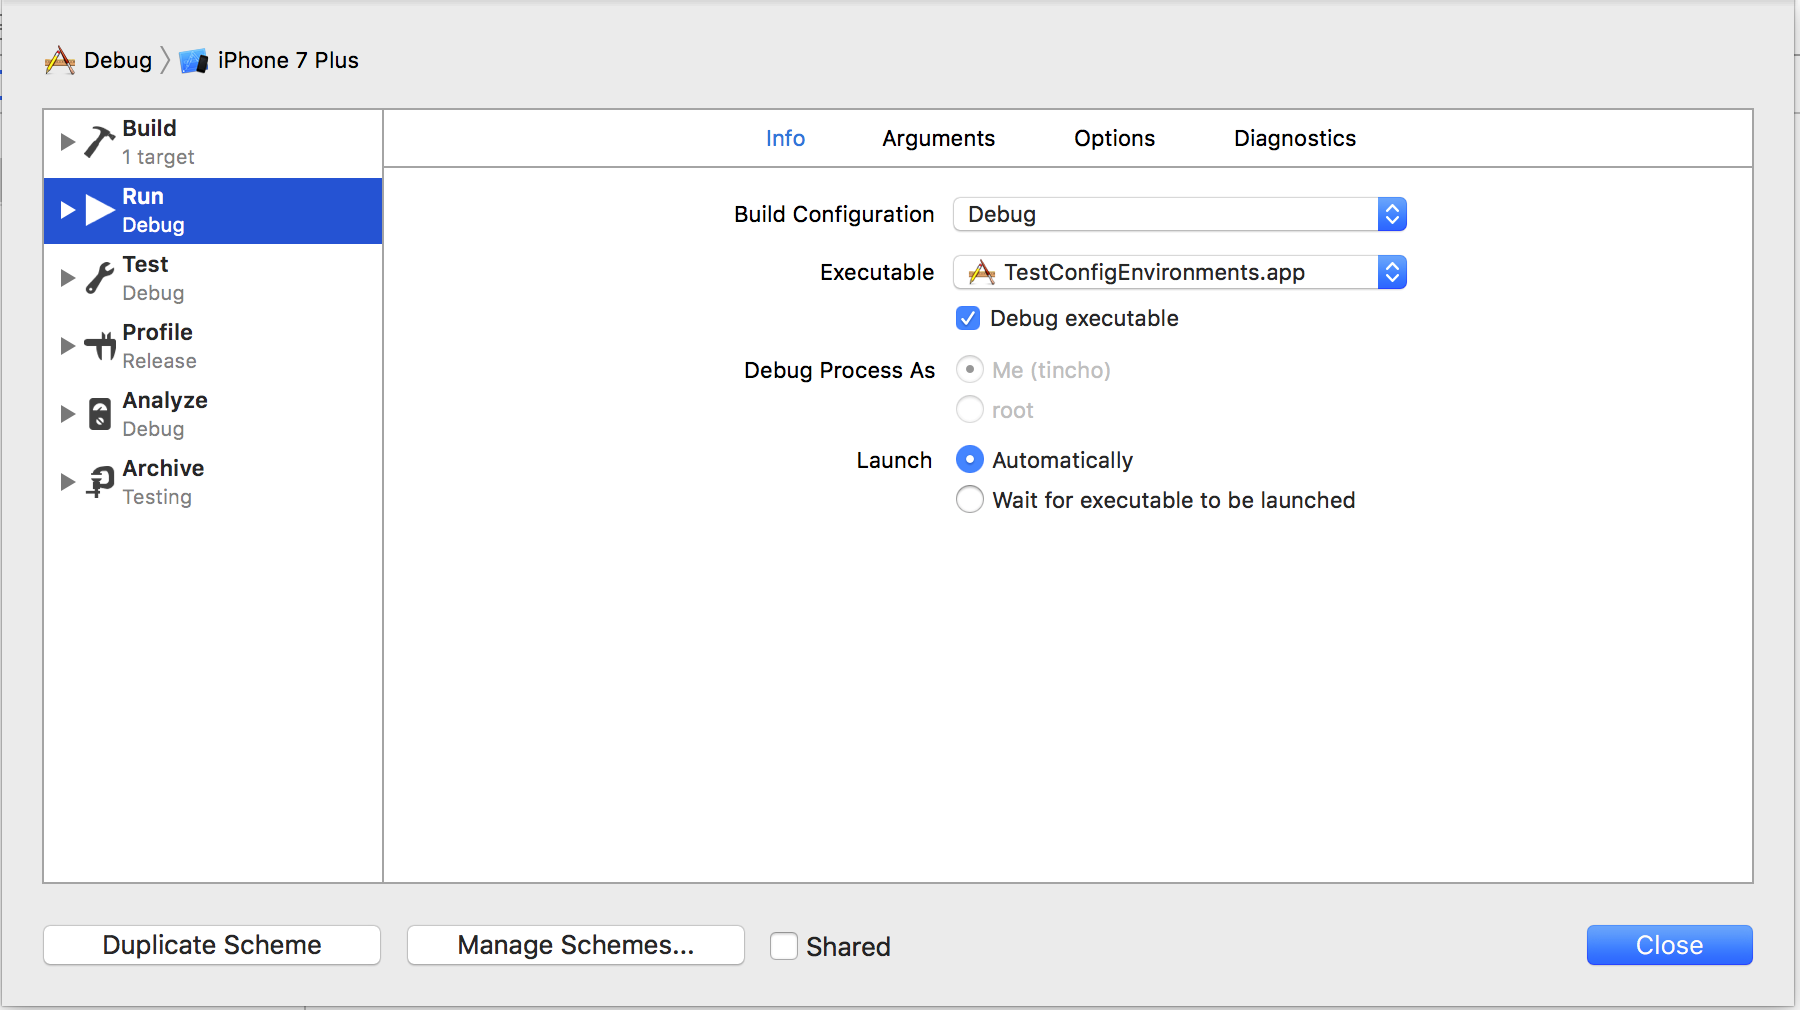
As seen in the picture above, we must assign the Debug build configuration to the Run stage in the Debug scheme.
Testing
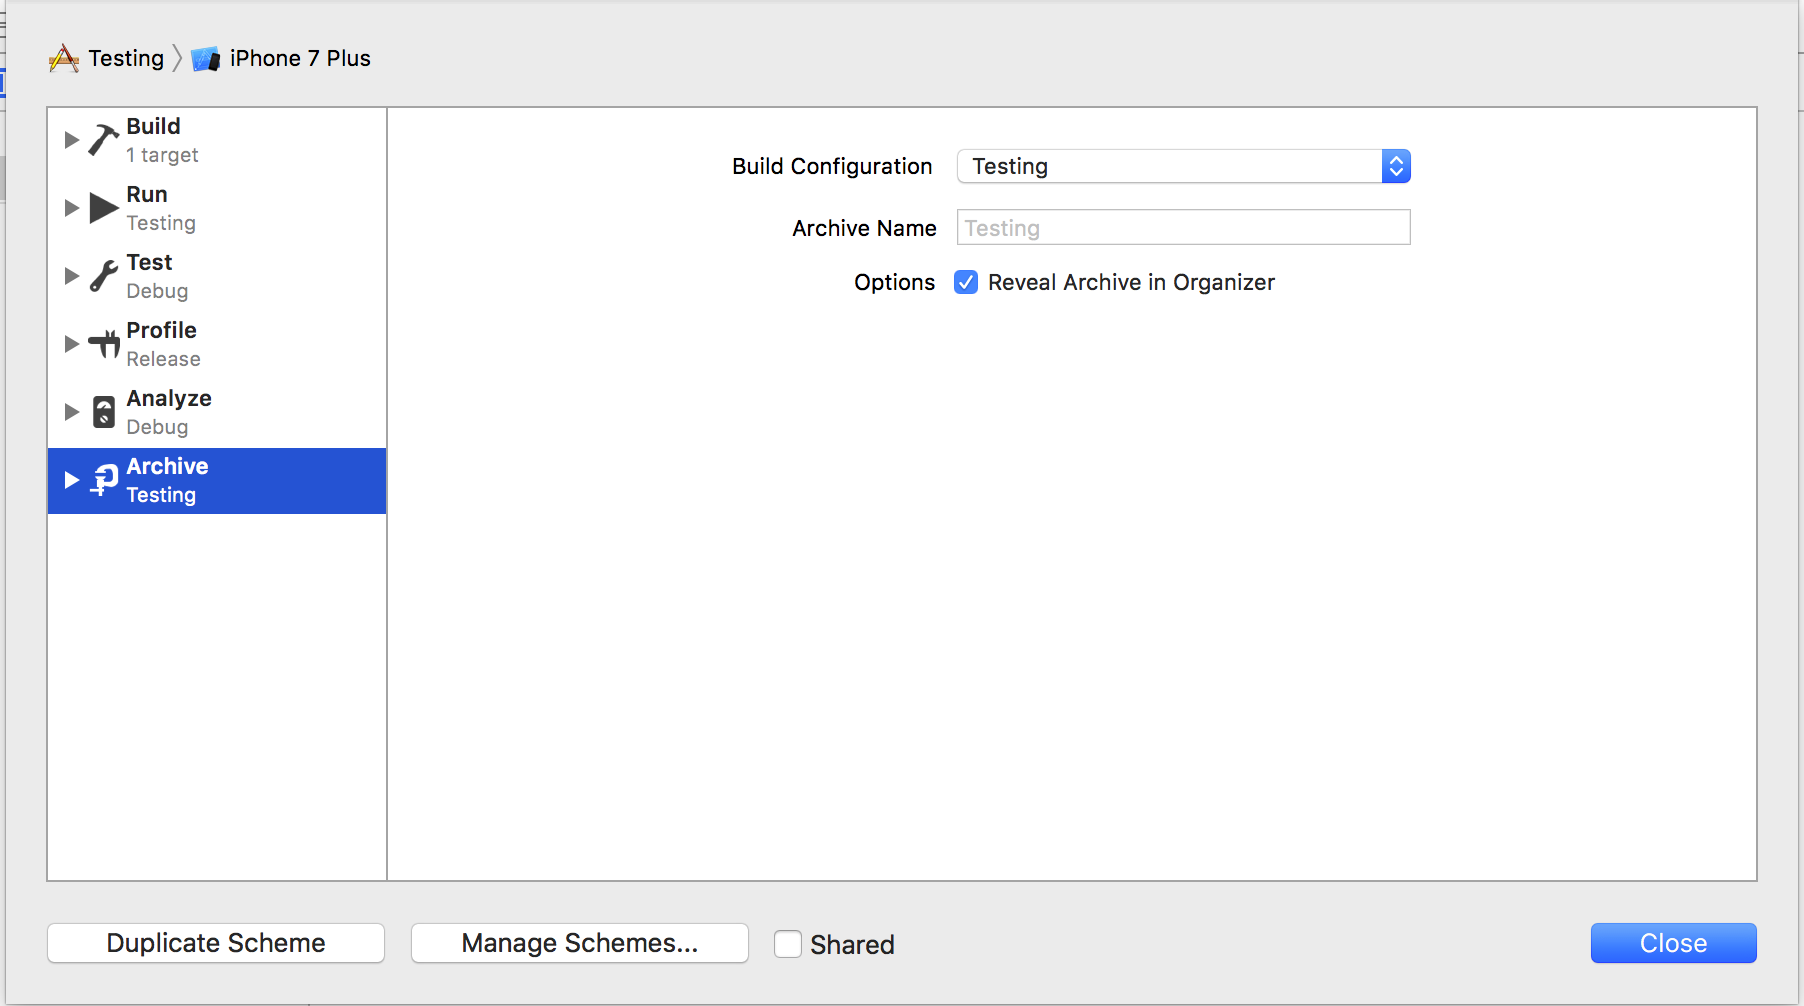
Since we will use the Testing scheme for releasing internal builds we must configure the Archive stage of the scheme with the Testing build configuration, as seen above.
Release
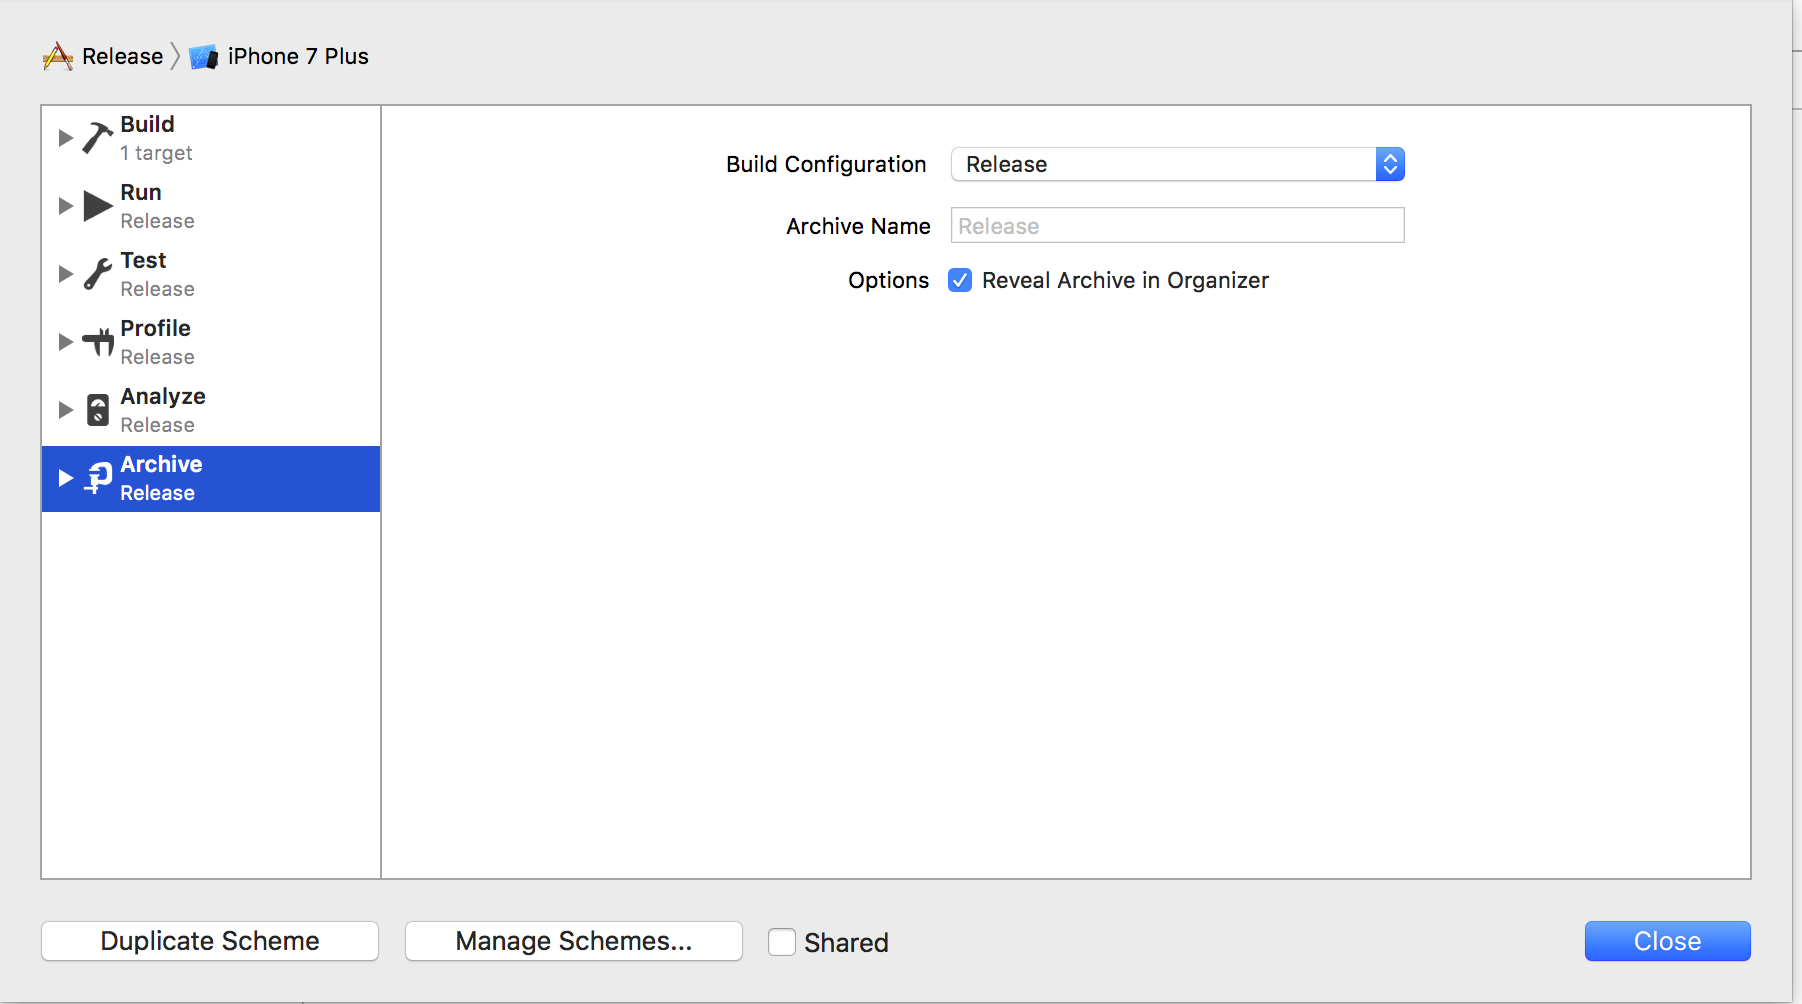
We will use the Release scheme for releasing builds to the App Store, so we must also set the Archive stage. We will use the Release build configuration for this, as seen above.
Configuring and getting environment-dependent constants
Info.plist modification
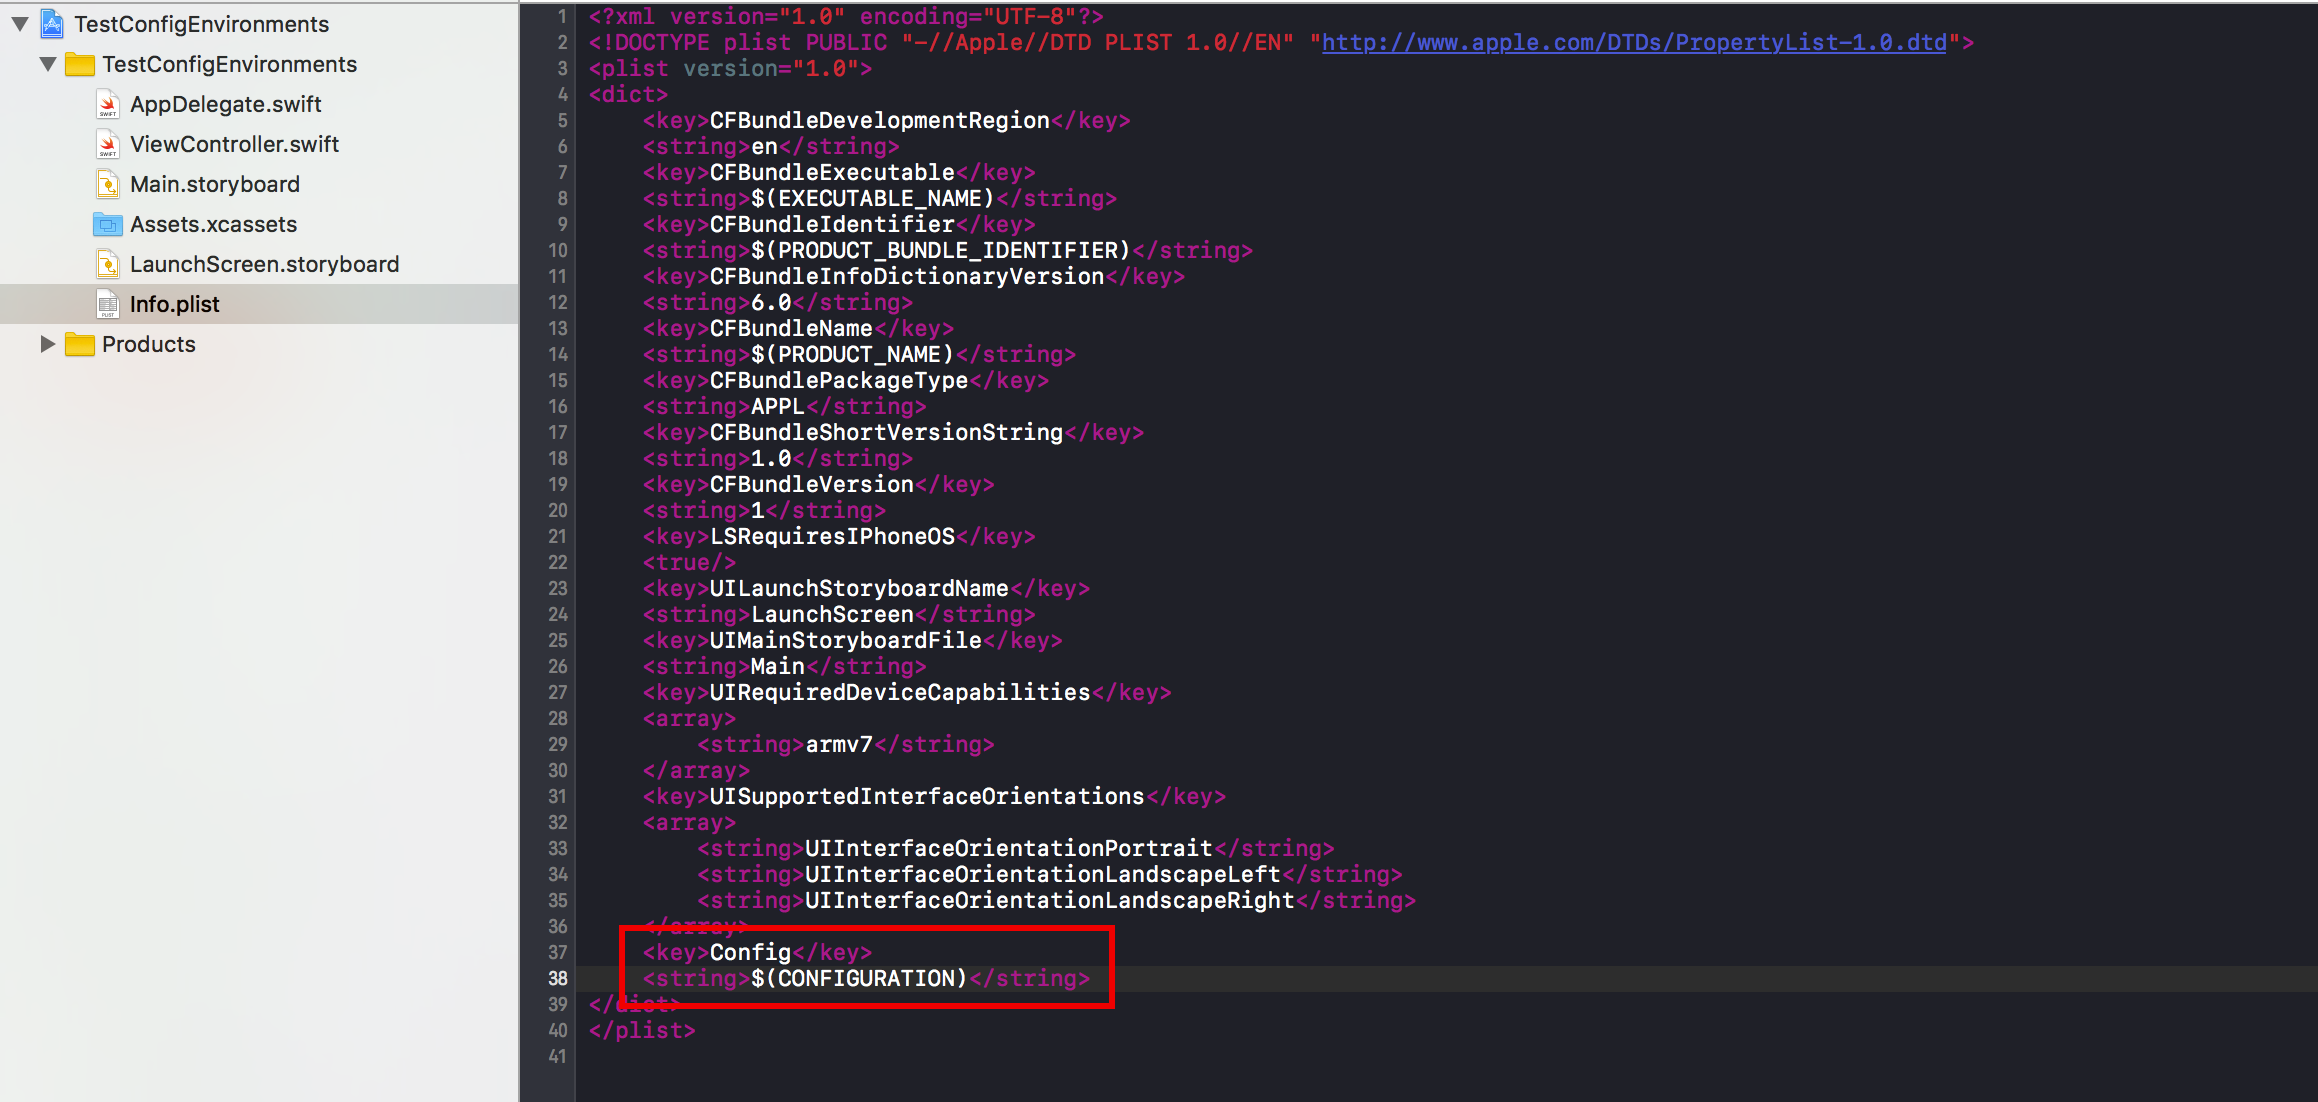
As seen above, we will add a string with the key Config which will hold the value of the CONFIGURATION environment variable, which corresponds to the build configuration we are using.
ConfigurationManager
We will create a Singleton class called ConfigurationManager which will provide the methods for accessing environment-depending constants.
import Foundation

class ConfigurationManager: NSObject {

    enum Environment: String {
        case development = "Debug"
        case testing = "Testing"
        case production = "Release"
    }

    static let sharedInstance = ConfigurationManager()

    var configs: [String: String]!

    static let currentConfiguration = Bundle.main.object(forInfoDictionaryKey: "Config")!

    override init() {
        if let url = Bundle.main.url(forResource: "Configuration-\(ConfigurationManager.currentConfiguration)", withExtension: "plist") {
            do {
                let data = try Data(contentsOf:url)
                configs = try PropertyListSerialization.propertyList(from: data, options: [], format: nil) as! [String: String]
            } catch {
                print(error)
            }
        }
    }

}
When the class initializes it will use the Config value we added to the plist file (which holds the build configuration name).
ConfigurationManager+Properties
This extension will add the methods that will be used to read the constants for each environment.
import Foundation

extension ConfigurationManager {

    static var environment: Environment {
        return Environment(rawValue: ConfigurationManager.currentConfiguration as! String)!
    }

    var serverBaseURL: String {
        return configs["SERVER_BASE_URL"]!
    }

}
In the code above we can see how to get two variables:
-
environment: Returns the current environment in which the app is running, in case we need to do something that depends on that factor.
-
serverBaseURL: This is one of the most common examples for a setup like the one we are doing. In this case it will return the base URL for the correct server instance depending on the environment we are running the app in.
Environment-Based property files
We will use property files for storing the constants for each environment.

In the previous image we can see three files which are named “Configuration-$(CONFIGURATION).plist“
We must respect the name format, because that is what the ConfigurationManager will use to retrieve the correct properties file.
Multiple bundle identifiers
Using a different bundle identifier for each environment will let us install all three versions of the App in the same device, without removing other versions when installing one, and without messing stored data (like keychain information for example) between environments.

Here we can define which bundle identifier to use for each environment. We leave Release without a suffix because it is the one we will upload to the App Store.
Multiple App Names
To better differentiate which build we are running on a device we can have multiple app display names.
That can be set in the build settings of the Target.
As we did with the bundle identifier, we will leave the one for Release unchanged and add a suffix to the other ones.

Multiple App Icons
In order to better identify the different versions of the apps we build and distribute, we are going to change the icons used for each app.
For that we must create three sets of icon assets.
We are going to take the icon for the app and apply slight modifications for the Development and Testing environments. As with the app’s name we will leave the one for Release unchanged.
Using simple image editing tools we can create icons like the following:
![]()
![]()
![]()
Using a tool like the awesome MakeAppIcon we can easily create all the assets needed for our icons.
After we generated them, we will need three sets of Icons in our Assets catalog.
![]()
Finally, we have to set the correct name for the AppIcon in our Build Settings:
![]()
Checking setup is correct
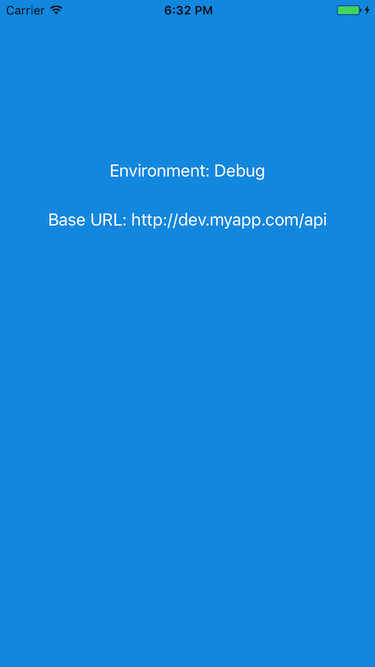
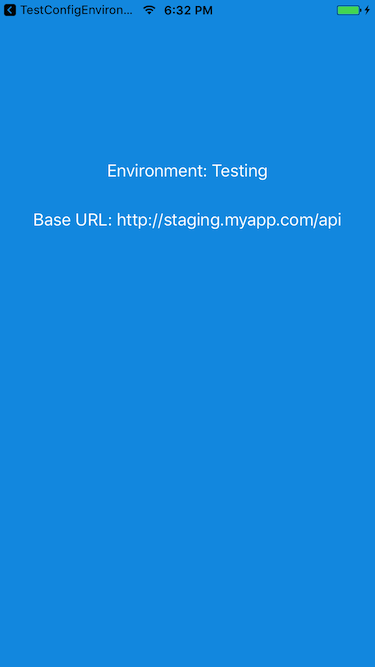
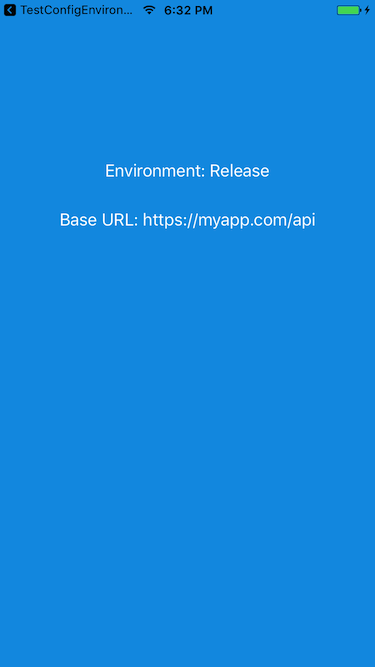
In this example we are going to display a couple of labels with environment-dependent information just for the sake of testing the whole setup.
We will add a label which will contain the name of the environment we are using, and another for the server base URL.
The code for our ViewController is like this:
import UIKit

class ViewController: UIViewController {

    @IBOutlet var environmentLabel: UILabel!
    @IBOutlet var serverBaseURLLabel: UILabel!

    override func viewDidLoad() {
        super.viewDidLoad()

        environmentLabel.text = "Environment: \(ConfigurationManager.environment.rawValue.capitalized)"
        serverBaseURLLabel.text = "Server Base URL: \(ConfigurationManager.sharedInstance.serverBaseURL)"
    }

}
After running the project we will get the following screens when running with Debug, Testing and Release respectively:
Let us know in the comments below if you have any questions or feedback. You can also contact us at [email protected] or visit our site for more info about us.


